your family stories
Printed Photo Organization
Printed photo organization can be an intimidating, time-consuming project, but what a relief to have your collection neat and tidy and to be able to find a photo you want when you want it; to know that it is ready to transfer into the hands of the next generation.
Below are some tips on how to tackle printed photo organization.
Is it too overwhelming or time-consuming for you to take on yourself? By spending some time together to learn about your goals and your family, I can take on the project for you.
Schedule a time to tell me your goals and talk about how I can help you.
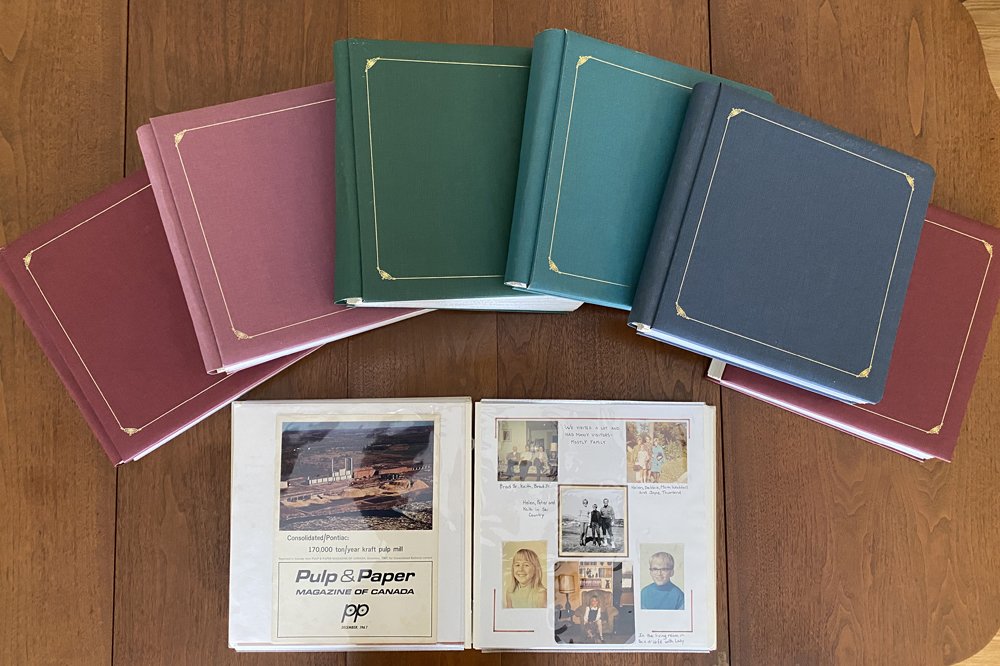
 A mess of loose and framed printed photos, photo albums, slides and negatives of various ages needing organization. This mishmash of image formats makes it difficult to know easily what you have. It also makes it difficult to find what you want if you have a project you're working on. To be honest, this is a fraction of my collection.
Prepare your Printed Photos for Posterity
Most of us of a "certain age" have decades worth of printed photo piles in varying degrees of organization. These printed photos tell the story of your life, your family and other people you love.
Or, maybe you're the family "archivist" who has been given the collections of those who've passed on. What if these photos remain disorganized, in piles, boxes and bins all over your home and are never properly identified?
The question is: What will happen to these photos when you are no longer here to tell their stories?
We've all heard the horror stories of things being thrown in a dumpster because no one has the time or energy to determine what is of value and worthy of saving.
Organize your printed photo and slide collection and ensure that it is not too overwhelming to pass on to another person. Prepare your legacy.
Tackling Printed Photo Organization
These same suggestions for printed photo organization can be applied to organizing your slides and negatives.
- Step 1: Complete a timeline of your life: For example, list the dates when you lived in different places, entered and graduated school, jobs worked, dates of marriage, birth, and other major life events to help sort chronologically.
- Step 2: Gather ALL the photos, albums, negatives and slides you can find in one place.
- Step 3: Divide them into piles of like objects, prints with prints, albums with albums, slides with slides and if the negatives are stored separately, keep them together too. If the negatives are with the corresponding printed photos, they can be kept together.
- Step 4: Starting with one pile, let's say loose printed photos, start grouping them by time period, family or theme, something that makes sense to you. In my case, photos from my four grandparents and their ancestral families would be sorted into their family groups and then more recent photos would be separated into decades.
- Step 5: Remove photos from the sticky albums using safe techniques, sort and store with the appropriate piles. Keep track of the order they were in (take a photo of each page). Usually there is some sort of organization within an album. You might want to keep the older black albums intact.
Kyla Ubbink is an Ottawa-based conservator specializing in book and paper conservation and restoration. She regularly gives workshops and presentations on how to care for your precious family treasures. Here she is showing members of the British Isles Family History Society of Greater Ottawa how to remove photos from "magnetic" photo albums with sticky pages using dental floss.
- Step 6: Store the sorted photos in boxes, preferably archival, either with or without archival envelopes. Some archival envelopes have a pocket to put the negatives in. Or, negatives can be stored separately and cross-referenced to the box where the photos are stored.
Notes about the collections can be put on photo-safe index cards or you can even write on the back of the photos - but be careful! Use a stabilo pencil and write softly so as not to damage the photo.
When you encounter blurry photos, photos that are almost identical, or duplicates that were produced when they were printed, these are among the ones that you can feel free to throw away.
You will find that once the printed photo organization is complete, the collection will take up less space and will be easier for your family to handle when it's time to hand it over.
Repeat the process with your slide collection.
What next? Protect your Photo Collection
Forest fires, flooding, ice-storms, tornadoes! Oh my!
Today's more frequent disasterous weather events put our family collection of pictures, documents, and multi-media at risk!
Once you have your photos (and slides), documents and media organized, the first and most important next step is scanning to digital format. If your collection of printed photos is lost or damaged, you will still have a backup.
An organized collection is faster and easier to digitize and to share selectively with family and friends in multiple ways and be ready to use in new projects - printed books, slide shows, to display on your wall.
Your children and grandchildren will enjoy learning about who you are and what life was like "way back when".
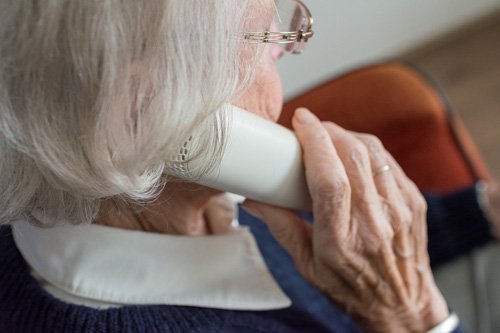
Photos and Oral History
Record yourself or an elder going through the now organized photos and telling stories about the individual images. When recording, be sure it is clear which image is being talked about.
One option is to meet in an online video call, present digitized photos one at a time and have the other person comment live. Record the call and you will not forget which photo the interviewee was talking about.
Another possibility is to sit together with the interviewee and show the photos in a digitized slide show. You may be able to record right into the program and move forward to the next slide when finished talking about a photo.
Of course, I would be happy to prepare the photos and record the conversation with you or another interviewee.
Ask me how I can help by scheduling a conversation below.
Schedule a free 30-minute initial conversation about your goals
Go to Scanning and Digitization
Links to British Immigrants in Montreal pages:
FTC Disclosure - If you make a purchase by clicking a link or an ad on this site, I may receive a commission on the transaction at no extra cost to you.
What's New?
-
Family History Books
Aug 17, 24 03:35 PM
 Family history books require a great deal of time to prepare and can involve several stages of preparation, but creating a legacy is worth the effort.

Deborah Waddell is an independent member of the Evalogue.Life network of professional oral historians.
You might like these
Genealogy Services
I can provide a variety of genealogy services, from local or online research, to oral history interviewing to transcription of that interview.
Why is Oral History important?
Why is oral history important? It is an efficient way to record a person's story in an interactive situation and prepare it to be shared.
Oral History Interview
What do you get when you pay for an oral history interview? Audio file, transcript and USB (Thumb drive).
Scan 12x12 Albums
How do you Scan 12x12 Albums? Most home scanners don't permit scanning of a 12x12 page. 2 scans can be merged but is time-consuming and lesser quality.
Family History Books
Family history books require a great deal of time to prepare and can involve several stages of preparation, but creating a legacy is worth the effort.